Monday, December 15, 2014

IAR "End of the Year" Blog Hop

Welcome to the I Am Roses “End of the Year” Blog Hop!
If you are following along the hop line, you should be coming from Kate's blog. If not, and you've just joined us, please feel free to check out the rest of the line up listed at the end of this post, and remember to leave comments on each stop to increase your chance of winning a great prize! 
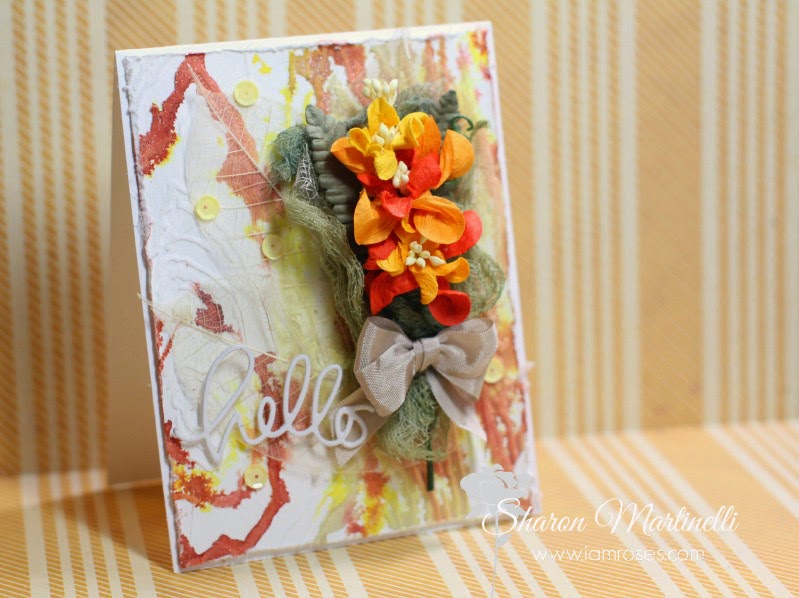
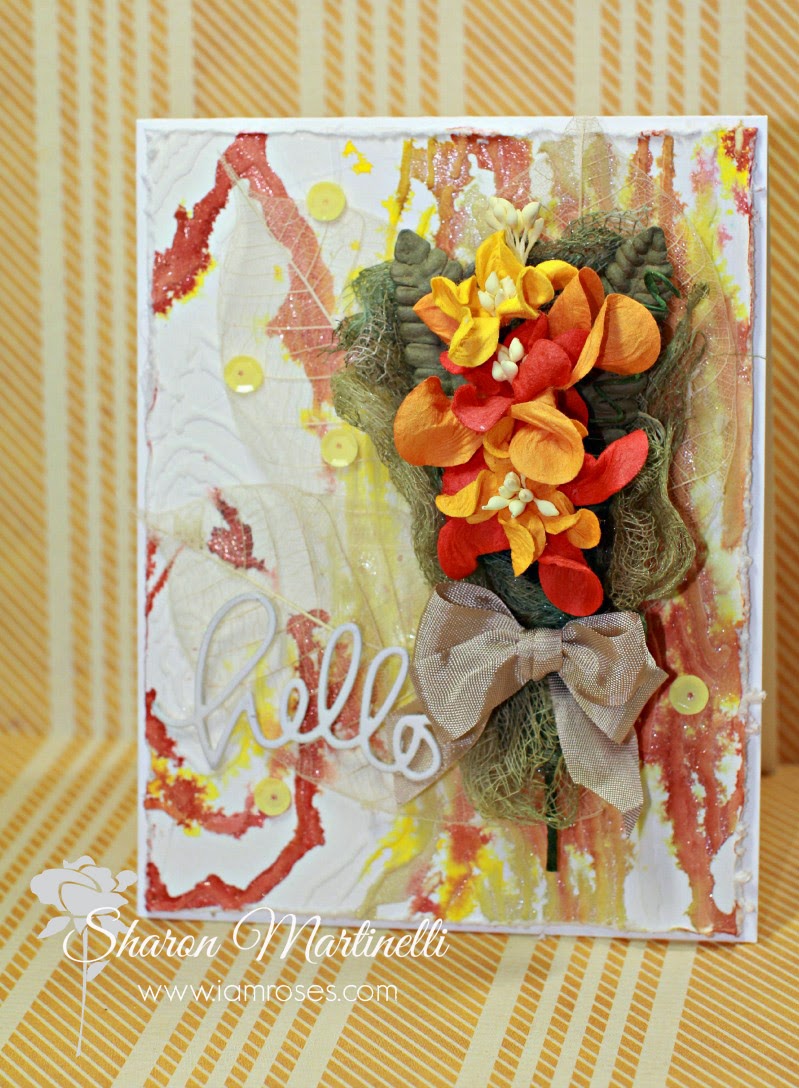
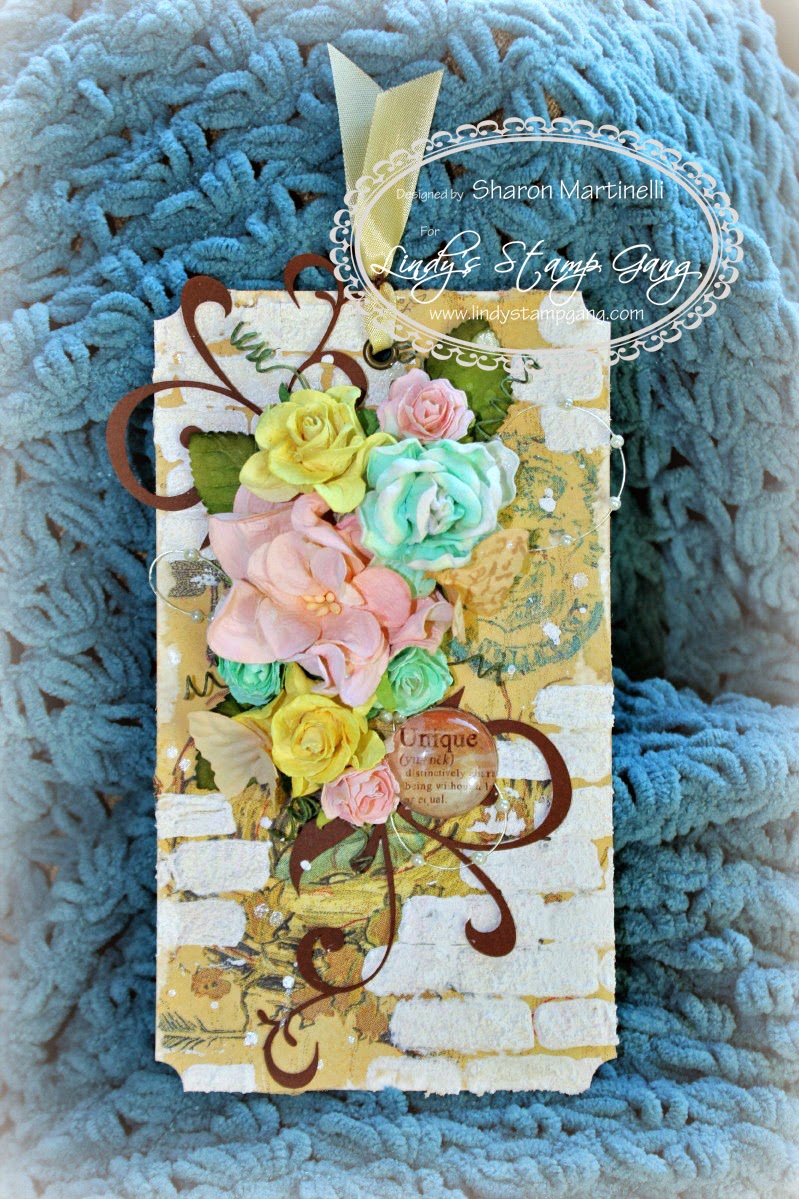
For this hop I created some paper ornaments which are great to add to your Christmas tree, and/or  to add to presents as an extra embellishment.  It's a little something special that is handmade and is very simple to do. 
I used several different I Am Roses products to create each of the ones below, and they are:
I used Tim Holt's Rosette Alteration die (the original version), as the base of the ornament, and decorated with flowers, leaves, stamens and some ribbon. The handmade products by I Am Roses make them look so pretty, and make the process of making these super fast, so you could easily make a whole bunch of them rather quickly, and decorate your whole tree without having to buy a single ornament! By using different designer paper, ribbons, and colored flowers, you could create a variety of different ornaments, with any theme in mind. The possibilities are endless!


Here’s the how to, for your chance to win:
  • Hop along to each of the Designers’ blogs and be sure to comment on their individual "End of the Year” Blog Post
  • There are 2 HIDDEN BLOG CANDY PRIZES up for grabs in TWO of our hoppers’ blogs!
  • Be sure to Subscribe/Follow the I Am Roses Challenge Blog (http://iamroses-challenge.blogspot.com/).
  • Commenting along the way highly increases your chance of winning the prize package.
  • Comments will be CLOSED on 11:59pm PST on SUNDAY, DECEMBER 21st
  • We will be randomly selecting 2 winners from the comments on two of the blogs and will announce the winners on the I Am Roses Challenge Blog. 
In case you get lost along the way, here is a list of the I Am Roses Design Team hopping today:

Good Luck!

Friday, December 12, 2014

Happy Late-Thanksgiving?!!?!

Hello there and Happy Late -Thanksgiving!
Believe it or not, I've had this Thanksgiving post set up for weeks before it's scheduled post date of Nov. 27th, and for some unknown reason, my blog did not post it, as it usually does when I schedule posts for publication on specific dates! On top of that, I did not check to see if the post actually went live the day it was supposed to, as I usually do as well! So yeah, basically my thanksgiving post never got published on this blog. Ugh!

Well, like I always say, better late than never, and I've just decided to post it anyways today, which is when I noticed it on my blog's dashboard, marked as "draft" just when I came here to draft a blog post that will be up in the next few days (yeah can you tell I haven't even seen my blog dashboard in a while?! It's been a crazy end of the year for me).

Anyways, here's the original post that should have gone up on Thanksgiving day for you guys. It is very ironic it did not go public when it was supposed to, and you'll see what I mean when you read what I discussed in it. Remarkable! I apologize for it's delay, and I hope you enjoy it.
__________________________________


Thanksgiving is just around the corner, and it's a sad thing that commercialism has made it so you barely hear about it, as Christmas seems to be "what's up" from now until the end of the year!
I cannot believe the amount of Halloween, and every other holiday decor, hype etc, yet when it comes to Thanksgiving, we barely get to see anything at all, as Black Friday, Cyber Monday, as well as all the preparation for Christmas decorating takes over all the stores, schools etc etc.

Thanksgiving is SO IMPORTANT, but I see how every year, it all gets diminished to a meal interrupted by super sales. Come on! Have we forgotten the importance of Thanksgiving? I think we have kind of "let it happen", and it seems to have gotten to the point of no return. So sad.

Well, I refuse to let it go by unnoticed, and I made this card using the Lindy's Stamp Gang Color Challenge Palette for the month of November.
I used several different colors of Magicals ( Golden Sleigh Bells, Red Hot Poker Orange, Autumn Maple Crimson, Canna Lily Burnt Orange, Cattail Copper Brown, Tibetan Poppy Teal, Sweet violet Purple Teal) to create the color gradation on the leaves, which were cut by the Tim Holtz Alterations Autumn Gatherings die. Once the leaves has color, I added a bit of embossing powder in Angel Wings Gold. I stamped the sentiment using a Stamping' up stamp set called Tags 4 You, using Chestnut brown chalk Ink and Twilight Bronze Slate embossing powder.
I hope you like this card, and take some time to join the Lindy's Stamp Gang Color Challenge. This month's challenge is almost coming to an end, so hurry on up there to find out the rules, and what to do to enter. You can win a $50 gift card! Thanks for stopping by. I'm thankful for you!

Friday, November 14, 2014

"Very Merry" Gift Tag

Hello friends!
Today I want to share a gift card I created using some I Am Roses products, as well as some Stamping up, Sizzix and more!
It's fun to make tags for your gift giving, and that's what I did for this post. I made a super cute tag (if I do say so myself!) that can be easily duplicated and mass produced!

I used beautiful Cherry Blossoms from I am Roses, as well as some white stamens from the site. They sure add some more pizzaz to that American Crafts Wood Veneer Reindeer, which I embossed all over using Lindy's Stamp Gang's Twilight Bronze Slate embossing powder. I just love the color and texture he ended up being! He is truly handsome, don't you think? Haha!

I added some texture using a doily in the background, yet I kept it all crispy white to make it a little more "elegant-cute", instead of "kiddy-cute", know what I mean? Some Martha Stewart punches (holly leaf and branch punch) were used, as well as Stampin' up embossing folder (Striking Stripes), some ribbon, and the "Short and Sweet "stamp set by Stampin' up.

Love how it came out. Do you?
Make sure you join the I am Roses Challenge this month for your chance to win some awesome goodies!

Thanks for stopping by today!

Friday, October 17, 2014

Thanksgiving is just around the corner!!!

Hello friends!
Today I wanted to share with you a fun tutorial, on how to create cute place card holders, as well as treat holders for your Thanksgiving table. The adults and the kids will love getting these at their place in the table. It looks like it's complicated to make, but it's really not!


Used some I Am Roses Flowers ( G1-426) (L21) (L20), as well as some Stampin up Sweet Treat cups, paper from the Ambrosia Collection by Basic Grey, some googly eyes, and some lightweight chipboard.

These are super cute and easy to mass produce, so no matter if you have 4,6,12 or even 24 people coming over for dinner on Thanksgiving Day, you'll have no trouble getting these done. Hope you enjoy the tutorial below!

Monday, October 6, 2014

"Cutie" Scrapbook Layout

Hello everyone! Today I want to share with you how I created my layout for the Lindy's Stamp Gang October Color Challenge reveal day. You'll get to see some close up shots, as well as enjoy a quick video tutorial on what I did to create it!
If you've followed me on my YouTube Channel for quite a while, you know very well the love affair I have with Lindy's Stamp Gang embossing powders. I just think they are so unique, and give any project such an awesome look. In this layout, I used several of them, in different ways, I love the two toned effect on the different areas of my layout. In the close up shots, you'll be able to tell the awesomeness of these powders. Take a closer look:  Sharon LSGOCTCC1 copy Sharon LSGOCTCC2 copy Sharon LSGOCTCC3 copy Sharon LSGOCTCC4 copy     

This is the finished layout in its entirety, and the video tutorial for you enjoyment. Hope you like it!Sharon oct 1

Products used:
- Hibiscus Rose Orange Embossing Powder
- Desert Moon Copper Teal Embossing Powder
- Black Orchid Purple Startburst Stain
- Stampendous Embossing Ink
- The Crafter's Workshop Mini Tile Texture template
- Dylusions Luscious leaves Stencil
- Petaloo Flowers
- Hobby Lobby Flowers
- Petaloo butterflies
- White doilies
- MME chipboard Sticker
- Prima Wood venner border
- Paper swirls from my stash
- Chipboard alpha from my stash
- Guesso and Soft Matte Gel Medium by Golden

Wednesday, October 1, 2014

Altered Paper Bag Tutorial

Hi there, and happy fall!

October is here and fall is in full swing, and you know what that means, Thanksgiving and Christmas is just around the corner!

Today I wanted to share with you an altered paper bag I created for the I Am Roses challenge for this month on the I Am Roses Challenge blog. This month's theme is to use black and orange and the challenge is to use/create/incorporate a bag.

I altered a kraft lunch bag using one of my Gorjuss Girl stamped images, and my daughter loves it!


I used Teresa Collin's Haunted Hallow's paper, Lil Inker Designs Small Bow Die, Simon Says Stamp "Expressions for you" Set (die and stamps), as well as I Am Roses daisies in black (D1-505), and also a few rose buds in both black and white (T30-274) (T30-151). In addition i added a doily, and some black tule to the back of the bag as my base for everything. Please enjoy the video below so you can see how this came together. To not miss any of my other tutorials, please subscribe to my YouTube Channel here. Thanks for stopping by!

Friday, September 19, 2014

A Fall Hello


Hello friends!
Seems like life has taken over my world, because again I have succumbed to posting fewer times than I would genuinely want to post in a month, ugh! Totally annoying because of course I'm so super hyped about getting a rhythm and then life happens and I'm stuck like chuck lol!
Well, I'm not going to let that pull me down, and we'll just go ahead with the next little project I have to share with you.


Made a fall themed card, as everyone seems to be longing so much for that time of the year which is quickly approaching, and I just had to join in the fun!
Like with most of my projects, I've made a quick video so you can see the process of me making this card. It has a funky background that shimmers in the light thanks to my trusty Lindy's Stamp Gang products. The I Am Roses items I used are the perfect shade for the spray combo I used. This card will be going in a special someone's package I'm taking to the post office hopefully today (or Monday hehe!).
You can enjoy on the video on my channel HERE, and here are the products used:
- I Am Roses SP1 Flower Spray
- I AM Roses  K1-805 Skeleton Leaves
- The Crafter's workshop  Mini Woodgrain Stencil
- Simon Says Stamp Small Hello Die
- Cheese Cloth
- Seam Binding
- Yellow Sequin
- Light Molding Paste by Golden


Tuesday, September 2, 2014

A Combo Made in Heaven!

Hello friends, and happy September! I'm super excited that September is here, as it is my favorite time of the year because this month is my birthday month yippie!!!
Today I wanted to share with you a project I made for the Lindy's Stamp Gang September Color Challenge, as well as the I Am Roses September Challenge. This month I combined both challenges and created the piece below:
The I Am Rose Challenge this month is Steampunk Themed, and I needed to incorporate butterflies somehow. The Lindy's Color Challenge Palette for this month is the following one:
I thought both challenges were a match made in heaven, and went for it. The Steampunk style is not necessarily my forte, but I liked how this turned out. I made a video tutorial on this piece, which up can find HERE for your enjoyment. I leave you with some close ups of my piece, and at the end a list of the items that I used:


Please go check out both challenges, and enter. Both promise great prizes! Check out Lindy's Challenge HERE, and I Am Roses Challenge HERE.
Thanks for stopping by!
Products Used:
- Tim Holtz Gadget Gears and heart Wing's Bigz Dies
- Tim Holtz Texture Fade in Gears
- Sizzix Embossing Folder in Cracked Surface
- Tim Holtz Stencil "Dot Fade"
- Golden Light Modeling Paste
- Tim Holtz Metal Gears
- Martha Stewart Buttlerfly Trio Punch
- Metal Clock from Michael's 
- Technique tuesday Sentiment Stamp "Chronology" Stamp set


Monday, August 25, 2014

Mixed Media Video Tutorial

Seems like just a few days ago the month of August started, and the Lindy's Stamp Gang Color Challenge was revealed, yet it's just a few more days until times run out for that particular challenge! As an inspiration piece for it, I created a mixed media layout, and today, I'm sharing with you the step by video tutorial of how I made it. A lot of people seem to like these types of start to finish videos, and I hope you enjoy it below.
I used a variety of products and the finished project is quite detailed, so here is a list for you of what I used for your convenience:
- Technique Tuesday's Technique Tiles in Fundamental Rings
- Crackle Paste by Golden
- Stamper's Anonymous Stamps: Mixed Media CMS125, School Desk CMS057
- Inkadinkado Stamp Set "Circle and Dots 97631"
- Lindy's Stamp Gang's Aug. 2014 Spray Set
- Lindy's Stamp Gang Embossing Powder in Reindeer Moss Green
- Lindy's Stamp Gang Embossing Powder in Silver Moon Saphire
- Lindy's Stamp Gang Embossing Powder in Midnight Violet
- Donna Salazar's Mixed Media Ink in the color Jazmine
- Jilibean Soup " Handwritten Sentiments" stamp set
- Cheese cloth

Here are some close up shots from my project:


And here is a picture of the entire layout. Please find the step by step video tutorial below as well. Hope you enjoy it, and are inspired to join in the challenge this month, for a chance to win $50 gift certificate to the Lindy's Stamp Gang online store. You can enter by clicking HERE.


Thursday, August 14, 2014

Keeping it Simple: A Birthday Card

Hi there!
It's been quite a while since I shared a project for my Super Simple Series, so today I'm sharing with you a birthday card I made, which would be super easy to mass produce because of it's simplicity.
I used I Am Roses Flowers for a decorative touch and I think it turned out pretty cute, don't ya think?
You can make your card any shape you want, but in this case, mine is a present. Just right for a birthday card, right? If you have a die cutting machine (manual or electric) you have tons of choices on which shapes to use. You can even try and cut some free-hand yourself (remember when you made heart shaped cards in school?) Shape cards are really fun, specially when you are able to fit them right onto a regular sized envelope. This particular one was a die cut by American Crafts which I thought was so adorable, and I could replicate easily in any size that I want.
From the card picture itself you can't see an unconventional way I used just part of an I Am Roses product, but I did. You'd have to watch the video HERE to figure out what that is!
Here's what I used:
- TU1- 00 Mixed Pink Tulips Paper Craft Flowers (hint: this is what I used differently on this card)

Friday, August 1, 2014

Altered Round Box and Video Tutorial

It's August everyone! Can you believe it! Unreal how the summer has flown by! Today I wanted to share with you a metal round box I altered for a friend, as part of the I Am Rose's August Challenge.
This month's challenge is to make something for a friend, and altering this small box was the perfect thing using a variety of I Am Roses Flowers.
         
As you can see below, I did not alter the inside of the container, but you sure could if you wanted to. It's perfect to hold a little gift, a piece of jewelry, or some candy or any other small treat. The variety of flowers and colors look great with the paper collection I used.


Here is all that I used to make it:
- Metal round box (from my stash, but you can find them at Michaels, Joann's or Hobby Lobby).
- Kaiser Craft Hummingbird paper Collection (also used Sticker and die cuts from the collection.
- Mint Green Puffy Semi Rosebud from iamroses.com 
- Mixed Rainbow Pastel Lily Paper Flowers from iamroses.com
- Mixed Lily paper Flowers from iamsroses.com
- Tulips in varied pinks from iamroses.com
- White Fern Leaves from iamroses.com
- White Rosebud from iamroses.com 

You can watch a quick tutorial below. Thanks for stopping by!

Thursday, July 31, 2014

U R My Favorite! Card & Tutorial

Hello friends!
There's always something you can count on every month, and that is for Lindy's Stamp Gang to put out a new and fabulous color palette to get the inspiration flowing! This month's color palette was super patriotic yet so full of possibilitiesm and you might have seen on the Lindy's Stamp Gang blog earlier this month what I created using it:

I made a step by step video tutorial, which if you are subscribed to the Lindy's Stamp Gang Newsletter, you already saw first than anyone else, as it was released to newsletter subscribers only, until today, when I make it public for everyone (you can subscribe to their  newsletter if you are not already by clicking HERE).  In the video, you get more details on how the colors and textures were achieved. So much fun to make!
The video is now public, and available for watching on my channel.  

I used the following products to make this card:
-Mini Bubble Doily Stencil by The Crafter's Workshop
-Clear Embossing Fluid by Stampendous
-Mini Art Is Stencil by The Crafter's Workshop
-Modeling Cream in the color Pearl Champagne by Viva
- Retired Crackle Background Stamp by Stampin' up (2005)
-Scotch Broom Yellow Two-toned Embossing Powder by Lindy's Stamp Gang
-Wood Veneer Frame from Michael's stores
-Wood Veneer Clock by Prima
-Wood Veneer Tag by Prima
-Scrabble Tiles from my stash

Friday, July 18, 2014

A Sympathy Card

Good morning friends!
Today I come to you with a  card I created using I Am Roses flowers.
It's a simple card which just pops with color. I love a lot of color, yet I wanted to make this a simple, but sweet card, and I think the I am Roses flowers I used, did just that. I used the small mixed pink  yellow white flowers (S10-623), as well as the white small fern leaves (B15-151).
The rest of the embellishments where from my stash, the paper collection is by Echo Park (Capture Life by Alison Kreft), and the sentiment came from an old Stampin up set called " Kindred Spirits"

Hope you enjoyed today's project, and have a nice weekend!

Wednesday, July 9, 2014

"Thanks" Mixed Media Background Tutorial

Hello everyone!
I've been thinking of bright colors which are perfect for the summer, but which I've been failing to see lately because it's just been so dark, gray, and gloomy here where I live. It rains everyday! Everyday! Thunderstorms, lightning, floods, you name it. I'm sick of rain! I decided to make a bright thank you card to lift my spirits.
I started by adding water to my work surface (a piece of watercolor paper), and then added on top  some super bright colors from the Caribbean Cruise Flat Fabio Spray Set from Lindy's Stamp Gang. This set is one of my favorites, and is also really close to my heart, because I helped design it. Adding water first to my background allows for the sprayed colors to blend seamlessly into the background. I used Hisbiscus Rose, Mango Mania, Luscious Lime, and Pineapple Paradise.

After that, I started adding on the texture. I took a trellis stencil by Heidy Swapp, and added some Golden Soft Gel medium (Gloss), and also a bit of Golden Light Molding Paste. After letting them dry a bit, I used the same colors stated above to spray over the new surface created by the mediums. You can see in the picture below the different finishes they created on the surface of my card.

Next, I took my Signo Uni-ball White Pen to outline the trellis shapes all around the card randomly.
After that, I took extra watercolor paper, and sprayed some of the same colors I used on my background, so I would have some colored paper where to emboss the trellis shapes you see added on top of the molding paste.
I used a Stampin up Stamp set called "Mosaic Madness" to get these individual mosaics, very similar in shape to the trellis background. I embossed them unto my colored watercolor paper pieces using Lindy's two-toned embossing powder in the color Midnight Pewter.
After embossing the shapes, I punched them out using the coordinating punch to the stamp set (sold by Stampin' up). I also stamped randomly with Archival Black Ink on my background, using a thiner stamp from the same stamp set. With some dimensional adhesive I glued the individual mosaics I embossed, to the background.

I took the wood veneer word "thanks", from Studio Calico, and embossed it using the same embossing powder I used before, and adhered that to the card. I lined it with my white pen to make it stand out.
My last step was to add the background to my white card base, and sprinkle and splatter some Frozen Jack Frost Spray on top of it, to finish off the card.
Here's the finished product:
I have a video tutorial available on my channel so you can watch the process on how this came together. I hope you enjoyed today's tutorial, and you join me back right here soon. Until next time!

Monday, July 7, 2014

Bellelive Blog Tour Nomination

Good morning everyone! Hope that everyone that's in the United States had a wonderful 4th of July weekend. It was definitely and actively packed one for me and my family, so I have to admit, I'm super tired starting the week. I cannot wait for Friday to get here already!!! It was a super fun time. Hope you enjoyed yours too, even if you don't celebrate the 4th!

I was nominated as a creative blogger by one of my artsy friends, Ivett Carrillo, to join in on what I like to call, a chain of fun blog hop tours, where so many of us will get to meet new bloggers, get new inspiration, and connect with blogs that will open up our creativity, to new views, new techniques, and new creative experiences.
Click HERE to read Ivett's post if you missed it.

There are four questions all the participants need to answer, before they nominate three other bloggers to continue on the tour. I will answer my four questions, and then lead you to three beautiful, and talented artists, I'm sure you'll love visiting, so make sure you read up until the end!

QUESTIONS
1. What are you working on?
Right now, I have to say I'm working on a lot of things, and not necessarily all "craft" related. I've been working making many design oriented decisions around my house, as we are working on making it into a home, after moving in, in the recent months. Everyone who's moved into a new home, knows exactly all the work it entails in the beginning, so a mist of doing all that,  I've also been able to create here and there...maybe not as often as I would like, but at least I've been creating. I do work from home, so my "me time" is very limited, but I enjoy making things, so no matter what, I always have tons of ideas running through my head that will eventually find their way to my paper, scissors, paint brushes and glue.
Recently, I've been playing with the idea of getting back into making more 12 by 12 scrapbooking layouts, but mixed media keeps calling my name. However, I don't share much at all the mixed media stuff I make. I have been keeping that to myself for some reason, but have been thinking for quite a while about sharing more when I'm comfortable with it, so I guess it's just a matter of time. 


2. How does your work differ from from other's of it's genre? 
I think my work continuously goes through a metamorphosis of my own raw, development. I'm not a trained artist, scrapbooker, or cardmaker. Everything I know, I've kind of picked up along the way with a lot of trial and error... I have however, taken Copic Marker training, and have actually, taught many others locally about them, and their use, but I'm no expert, and making pretty things has always just come natural to me.  I don't think I follow a specific trend, or style, but I feel I have fun with what I make, and that "fun" always shows on my finished designs, either on the color palette, texture, placement of embellishments, or overall style of project.


3.Why do you write/ create what you do?
I do because it is fun for me. It's my me time where I have an escape from the daily routine, and the stress of daily life. I enjoy making the variety of things I make, and it just makes me happy!

4. How does your writing/creative process work?
To this question I have to say, that there is not one answer I can give. My creative process, just like my style (if I can even say I have one) keeps changing and evolving continuously. My mind goes in all different directions, and as I learn new things everyday, it just allows for change to happen consistently.

Now the blog tour needs to continue, so here are the three creative bloggers I want you to meet:

Lizzy Wurmann
I'm lucky to work with this talented lady, who not only rocks color, but texture as well. She is super sweet, talented, and her art journaling style is one of my favorites!

Damaris Velazquez
Another talented blogger who dabbles in different areas of art, and I think does a super job at it! She recently picked up Project Life, and has done a fabulous job documenting her life with it, and her awesome Smash Books. Super funny, and one of my besties in  Florida state!

Lisa Nazario-Gregory
She is a color genie! or at least, thats how I think of her really! I love how she incorporates lots of color in her work. I have the pleasure of working with her on the Lindy's Stamp Gang team, and her scrapbook pages are gorgeous, gorgeous gorgeous!

Have fun blog hopping, and thanks Ivett for nominating me!

Tuesday, July 1, 2014

Repurpose Challenge: July 2014

Hello everyone!
So super excited to share with you today my repurposed project made for the I Am Roses July 2014 Challenge. The challenge for this month is to recycle or repurpose something, and I had this strange plastic sleeve from a cosmetic product I purchased, that was calling my name. I could not bring myself to throw it out, as I thought it as perfectly good acrylic that could not go to waste. It really looked like nothing much, but I just couldn't part with it, so......I repurposed it, and made a little treat holder with it!

I used Big Pressie Tia from Some Odd girl, colored her up with my Copics, used some My Creative Time Dies, I Am Roses flowers,  as well as some ribbon for the transformation. You could say that I also repurposed the turquoise ribbon too. Originally they were strips from an opened package I  received, which I ended up saving, because the color was so pretty. It came to good use!
You can easily add anything you want in this little treat box, candy, jewelry, a gift card....the possibilities are endless here. It was simple to create, and fun, this particular one, perfect for a birthday celebration.
I hope you are inspired this month to repurpose something, and submit it into the I Am Roses Challenge. There's a nice prize for the winner. Make sure you follow the rules to be eligible to win, and check below for the list of products I used on this project. Thanks for stopping by!

Products used:

1'' Yellow Cherry Blossom by IAm Roses.com
Small Yellow Flower by I Am Roses.com
Small Mixed Pink Gardenia Curly Petals by I Am Roses.com (inside the treat box)
Dear Lizzy Day Dreamer Paper Collection
EK Success Small Dotted Scallop Punch (discontinued product)
Copic Colors: E000, E21,E11, R01, R20, BV00, E15, E25, E29,Y02, Y06, Y08, Y19, 0, B52, B41, B45, RV21, RV34, RV34, RV69
We Are memory Keepers Small gold Eyelets


Friday, June 13, 2014

Thank You Canvas Bag Tutorial

Happy Friday everyone!
Today I wanted to share with you a tutorial on how I altered this cute canvas bag using I Am Roses Products. I initially got the plain bag at Target for just $1 . I got a few as I thought they had lots of potential for little gifts and even party favors!
Please watch the quick tutorial video on everything I did to get this plain little bag, colorful and full of dimension by clicking HERE. For your convenience, I have added names and the direct links to what I used, below this next picture. Hope you enjoy!


Products I used:
Canvas Bag (purchased at Target)
Lindy's Stamp Gang Flat Fabio in the color Pop Rock Purple
Heidi Swapp multiple dot Stencil (found at Michael's)
I Am Roses Big Taupe Crochet Flowers
I Am Roses Small Green Leaves
I Am Roses Pink and Yellow Mulberry Roses
I Am Roses Mixed Pastel Lilies
I Am Roses  White Mulberry Paper Flowers (I colored it green)
I Am Roses Small White Butterfly (I colored it green)
White card stock
Copi Sepia Multiliner
Chestnut Roan Colorbox Chalk Ink
Heidy Swapp Thank You Stamp (found at Michael's)

Tuesday, June 3, 2014

So much fun! 12 by 12 Layout

Hello everyone!
I am very excited to share with you my first scrapbooking layout in quite a while. Seems like forever really, but I'm just happy I got it done! To be honest, I've been overwhelmed with stuff lately, and haven't had much time to dedicate to crafting (seems like that's becoming the story of my life in the last eight months or so, but really, I just wish I could craft 24/7 that's all LOL).
Anyways, I had a blast creating this layout as an inspiration piece for the June Lindy's Stamp Gang Color Challenge, using the latex release, the Under the Boardwalk Flat Fabio Collection.
Super fun, creamy bright pastel colors with no shimmer that just make me happy!
Here's what I created:
I used three out of the five newly released products,  Orange Creamsicle, Raspberry Lemonade and Tilt a Wheel Teal,  some I Am Roses flowers (Daisy P700-15, Tiny White T2-15), Dear Lizzy's Day Dreamer Paper Collection, as well as a Day Dreamer wood veneer, some light modeling paste, a Prima stencil by Finnabair and the background paper is by Echo Park--the This and That Collection.

I hope you liked it, and can join in Lindy's June Color Challenge. I get excited seeing all the entries every month!

Sunday, June 1, 2014

I've been framed!

Hello there again!
So excited to share with you a frame I altered for the I Am Roses June Challenge. Have you checked it out yet? If not, head on over there and share your creation for a chance to win some awesome mulberry flowers!!! Click HERE for all the info on how to join in.

I altered this frame I bought at Michael's a while back, to give to a family member. It's a picture of my daughter and I, and it's just the right size I wanted.
I used the following I Am Roses products to alter it, as well as a few sequin pieces: 

Super fun and simple project that would make a great party favor or small gift for a loved one. Hope you liked it!

Friday, May 9, 2014

Give Flight To Your Dreams- No Bulk Tag Tutorial

Hello everyone!
I'm here today to share with you a tag tutorial, where I incorporated some I Am Roses flowers. A lot of people comment on how bulky flowers can be on your projects, but what I'm trying to show you today is, how with the variety of styles and sizes that I Am Roses carries, you can definitely make projects with tons of dimension, some dimension, or little dimension----you can achieve a variety of looks. Not everything needs to look super 3-D just because you use mulberry flowers, and the tag I share with you today, yes, has some dimension, but not nearly as much as the last tag I shared with you a few days back, for example (se previous post for picture). Both tags were created with I Am Roses flowers, but both tags have completely different looks, style, and dimension. The only thing that are the same are the colors I used, and the fact that the flowers are I Am Roses flowers.

Today's tag has texture, and dimension, without having too much bulk, which some people want to stay away from. You definitely can do that with some I Am Roses flowers, and here's my tutorial to show you just that.


If you compare this finished project, with the tag on my previous post, you can definitely see the difference in effects when using the different sizes, and styles of I Am Roses flowers. You can achieve a super 3D project with lots of dimension, but you are also able to achieve subtle, delicate looks on your projects as well. It's all in what size and type of flower you choose to use on your project, and the website provides tons of options.


I hope you enjoyed today's tutorial and appreciated the perspective of the post. Thanks so much for stopping by the blog today, and please see below all the products used:

-White Mini Rose Buds T1-151
-White Mulberry Paper Flowers R8-15
- Lalaland Crafts Hot Air Ballon Die
-Colorbox Fluid Chalk Ink in Creamy Brown
-Spellbinders Ribbon Banner Dies
-Just Rite Clear Stamps "Botanical Butterflies"
-Cheese Cloth
-Lindy's Stamp Gang Flat Fabios from the Tres Chic Collection
-Lil Inker Designs Cloud Die
-Impression Obsession Grass die DIE-060-I
- The Crafter's Workshop Mini Retrobursts Stencil
- Viva Modelling Cream in the color Pearl Champagne


Thursday, May 1, 2014

Tag Tutorial, May 2014

Hi everyone!
It's hard to believe, but we are already in May! Time flies when you are having fun, indeed! Seems like the year is flying by, and sooner than we know it, it will be Christmas again! I know my daughter is going to be really happy about that, ha!
When getting items together to create, I always enjoy using I Am Roses products and Lindy's Stamp Gang products together, and what perfect time to do that, than at the beginning of this month, when  new challenges start on each company's blog. Wooohooo! To me, they are a match made in heaven, as the I Am Roses take color beautifully, and with the Lindy's Stamp Gang sprays and paints, I can make those products any color I want easily!

This month's challenge, over at the I Am Roses Challenge blog is to make a tag. Over at the Lindy's Stamp Gang blog, the challenge is to use the following color palette:

I really had fun with this one, as Lindy's Stamp Gang just released today a new Flat Fabio Collection,  called "Tres Chic" which I used, and I picked up several different white flowers from the I Am Roses repertoire, and colored them up super fast, and created this super dimensional tag:
I made a start to finish tutorial on the makings of this tag, and was quite pleased with the result. The colors from the new Flat Fabio collection are super creamy, pastel colors, perfect to use on Spring and Summer projects, don't you think?
Please head on overt to the I Am Roses Challenge Blog, as well as the Lindy's Stamp Gang Blog, for more details on each of the challenges. They both have super prizes for the winners, so that's definitely a plus!

Here are the products I used to make this tag:
R5-15 White Mulberry paper Flowers
GB4-15 Big White Gardenias
G2-153 Pale Yellow Curly Paper Flowers 
R40-15 White Paper Roses
BF1-151 Small White Butterflies
ZQ-L0-0 Green Leaves
Snow Tex
Mini Bricks Stencil by The Crafter's Workshop
Lindy's Stamp Gang Flat Fabios in the colors: Merci Beucoup Mint, Cafe Au Lait, Bonjour Butter, Chateu Rose.
Hero Arts "Old Letter Writing" -Stamp S4878
Pale Yellow Martha Stewart Seam Binding
Prima Glass Bauble (2008)
Pearl Sprays
Diecut Swirls by Nicole Lombardo on Etsy
We r Memory Keeper Corner Chomper

Here's the start to finish tutorial for you. I hope you enjoy!


Related Posts Plugin for WordPress, Blogger...