Thursday, December 29, 2011

First Christmas Pictures

I'm sharing with you today the last layout I created for the month of December, using the Paper Niche's December Designer Kit. This layout is using some of my daughter's first Christmas pictures, and I really love these. She was so tiny back then.  I can't get tired of saying how amazed I am by how much she's grown, and how different she looked this Christmas, when compared to these old pictures.
It was super fun to create with this month's kit, and I can't wait to show you the next one. It's also a gorgeous one! If you missed the rest of the projects I did with this month's kit, just scroll down and see all the different posts with them.  Next up, I'll be sharing some tags I created, but I gotta go now to pick up my sweetie at school. See you back soon!

Tuesday, December 27, 2011

The Greatest Gift of all

Hello there!
I hope everyone had a wonderful Christmas holiday, just like I did, together with your family and loved ones. I'm pretty exhausted, as I'm sure many of you are, but pretty happy with all that went on. 
I can hardly believe that this year is almost over, and a brand new one is just about to start. New goals, new challenges, new adventures. To me, it feels like this year just flew by!
Just a few more days, and we say goodbye to 2011, but not before I share with you the rest of my projects for this month, so expect that in the next couple of days.
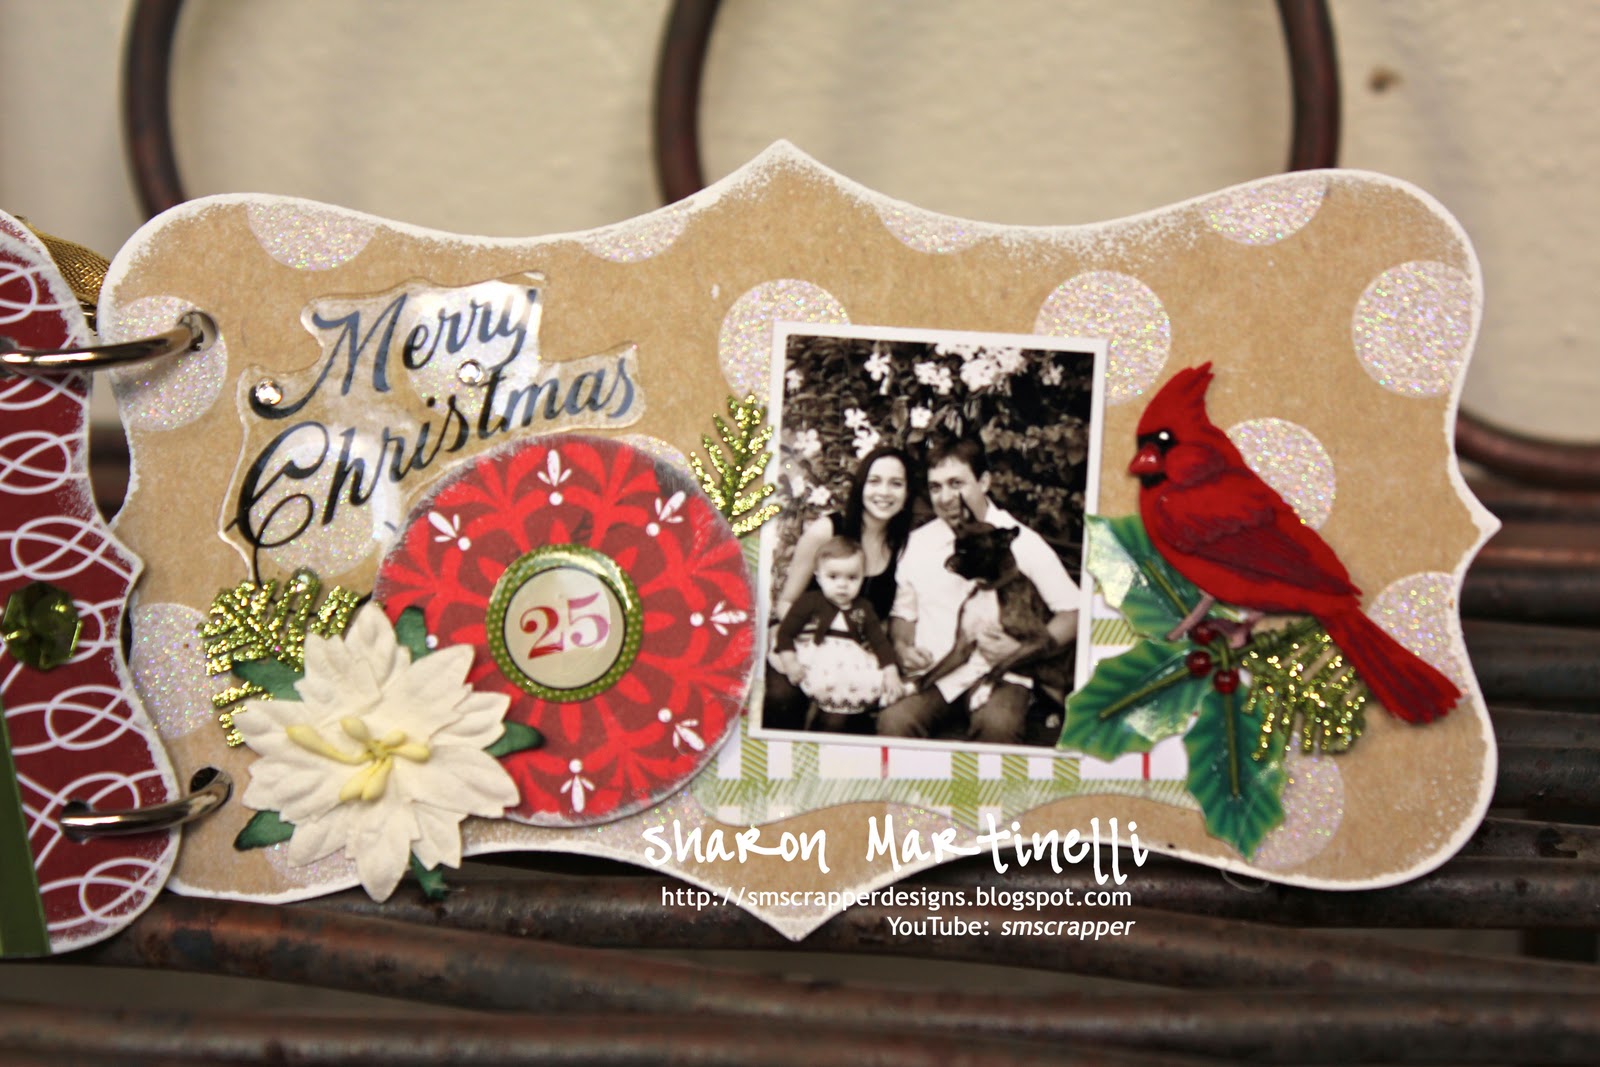
Today I bring you another layout using the Paper Niche's Design Kit for the month of December. I just love these pictures of my daughter, and had to use them on another layout. She truly is the greatest gift.
Pretty soon it will be her birthday again, and boy, is she becoming a big girl so quickly! She's not even two yet, and she knows her alphabet, most of her body parts, she's putting words together to make phrases, it's crazy! I did not expect her to know all this stuff at this age... this weekend, just in time for Christmas, she put all the words together and said, "I love you Mommy", I almost died....you see, she's been saying different words since she was about ten months old or so, but she  has said just about everything you can think off, except the word Mommy...she called me Daddy and laughed when she did so, as if making fun...it drove me insane!
I just kept thinking, why can she say ALL these different words (and when I say ALL, I mean a whole arsenal of words including difficult ones like umbrella, dinosaur etc.), why wouldn't she say something so simple as Mommy, specially when she could say monkey clear as day, which also began with the M sound??? It drove me bonkers LOL
Well, everyone I know kept coaching her into saying Mommy, and she would just laugh and say "Daddy!, Daddy! Daddy!"
Well, this weekend, she finally said it, and extremely clear too...and not only that, she added those three little words with it, "I love you Mommy"... sweet as can be, followed by the  sweetest hug and smile. Now, THAT's the greatest Christmas gift, even though, like the layout points out, she's the greatest gift ever!
Have a great week and as always, thank you for all your comments.

Thursday, December 22, 2011

One more Christmas mini!

I don't know about you, but I can't wait until Christmas day is gone and done with. Not because I don't like it, but because I am SO stressed out about it! Grrrrr it's been a stressful couple of weeks I tell ya!
However, a lot of progress has occurred since my last post, and my whole house is decorated, all the presents I have bought are wrapped, and all my Christmas cards have been mailed out, yay!
I'm hosting a dinner party this Friday and I'm cleaning, organizing, and gathering my cooking supplies like a crazy person....Still have two more gifts to purchase, which I hope to get to today, and wrap asap. Oh what fun, huh? LOL
I'm sharing with you today a Christmas Mini Album I created using the December Paper Niche Design kit.
On the cover, I did a background technique which you can look into by watching the video of the mini by clicking HERE. I used my Lindy's Stamp Gang Sprays and went to town on Tim Holtz's Tissue Wrap. 

These are the first two pages of the book. I cut the book out with an Accucut die (Lunchbox #1 Dividers) on medium weight chipboard.
On the next two pages there is more space for pictures and journaling, and  I used my Lindy's sprays on the flower you see on the top right. Love how the light reflects all the shimmer of it.
 The next two pages...
 Here's how the [ages look once these tags are taken out of their pockets.
Finally, these are the last two pages of the book which complete the album.
There are more details on all the pockets, and tags in the album video, so if you'd like to take a closer look, don't forget to click HERE to watch.
Just in case I don't get a chance to come back before Christmas, I want to wish each and every one of you wonderful readers, and followers a wonderful and very Merry Christmas!

Wednesday, December 21, 2011

Tissue Paper Background Tutorial

Hi everyone!
Today I bring you a tutorial of how to make a nice textured background using just a few supplies: card stock, tissue paper, alcohol inks and rub n'buff. The final look is awesome. I used a background with this technique on a card featured on this post HERE, a couple of months after I learned the technique from my friend Dale. She always shows me the neatest tricks.
After showcasing my card on a YouTube video HERE, I received a lot of requests from other crafters, asking me to film a tutorial on it. So, I finally got around to it and here it is! If you have any questions, feel free to contact me with them. I'll do my best to answer all of them.
Sit back, relax and enjoy the video!
Next up, is another Christmas mini album I completed. Hope to get the post up sometime tomorrow. Until then my friends :)

Thursday, December 15, 2011

Secret Santa!!!!!

Lindy's Stamp Gang is Having a SECRET SANTA SALE!!!! One day only! (Dec. 15)
Get 20% Off ALL Sets and Filagrees!
COUPON CODE: secretsanta
Remember: For all orders in the US over $40, FREE SHIPPING!
Stock up now!

Monday, December 12, 2011

A box and a Layout

Yes, I'm alive!
I've been very busy lately, and totally MIA from here, but I guess everyone is kind of crazy busy around the holidays, right? You probably didn't even miss me. Ha!
Well let me tell you, I have been Christmas shopping, and I'm kind of stressing out now, because I'm still not done, and usually by this time I've had everything I needed and mostly all wrapped too...I guess I'm leaving everything for the last minute this year, yikes! Totally dreading walking in the stores, that's for sure! 
I did start decorating my house, and the inside is completely done, except for my Christmas tree which I haven't even purchased. Can you believe that? I keep putting it off (I'm getting a small tree this year because Emily will knock it down for sure if I get a giant one like last year LOL)...hopefully this week I get on that because if not, we'll have to put our gifts under the stockings hahaha, or "shoes" like Emily calls them. She is totally into all the decorations, and the lights outside everyone's houses...It is so cute how she says "wights, wights, wow!"(for lights, lights, wow!). Ah, to be a kid again!
Anyways, I took some time today to start showing you some of the projects I created with the December Paper Niche Kit. It is gorgeous!!!! 
First, here's a cute box I made using a Big Shot Pro die, my friend Yeya allowed me to use. I just love how cute it is. Great to put some small gifts in, and even jewelry, or backed goods.
This next one is one of the layouts I made. I punched out some circles to make them look like ornaments, hanging from velvet ribbon.
I have a few more projects to share, but so many things to complete. Can you believe I haven't even addressed my Christmas cards yet? I am SO behind this year! Not to mention, I have projects I need to work on, and have no mojo what so ever! Crossing my fingers so this week is a nice "creative one" for me. Hope for you too!

Thursday, December 1, 2011

Great prices on Tim Holtz stuff and more!

Hello there! Two bog posts in a day. Can you believe it?!
Just wanted to give you a link on a new website that sells Tim Holtz, Spellbinders and more at great prices. All you need to do to have access to the deals is register (it's FREE!!!) and then you'll have access to the awesome deals they have all throughout the week.
Check it out by clicking HERE.
Hurry and get yourself some deals, won't you?
Had to enable!

December Sneaks

Hello bloggers!
WOW, I'm on a roll! This is my forth blog post since Monday! How about that? 
Today is the official release of the Paper Niche Design Kit for the month of December, and wait until you see that beauty! I had so much fun creating with it, I used every single sheet of designer paper on the kit!
This kit is going to be perfect for all your holiday projects. Here are a few sneaks of what I did with it, and yes, just sneaks for now because I haven't even been able to take proper pictures of all that I've done, because I've been working on the projects until just a few minutes ago, if you can believe it. Talk about cutting it close, right?  I'll be delivering my projects to the store as soon as I photograph them, and I'll be revealing them here like I always do. Take a look...


I love the traditional colors, and the "vintage" look I achieved using Vintage Photo Distress Ink....talking about Distress Inks, have you stopped by Tim's blog today? (and by Tim, I'm referring to the great Tim Holtz of course----clarifying just in case lol). He started his famous 12 Days of Christmas Tags Series today. I love every time he does it, so super inspirational! He never disappoints, so check it out if you haven't, I have a link on the right hand column of this blog :) 
See you back soon for the project reveals!

Wednesday, November 30, 2011

All grown up...

It's really amazing how fast kids grow. You've seen this picture of my Emily in a previous project, but I had to make a layout with it for her album too. This is her first school picture ever! Yes, she goes to school twice a week for three hours, so she can socialize with kids her age, and she can give mommy a small break. It's really hard not having any family members close to me to help me from time to time during the week, so those three hours (which by the way fly!) are three hours that I get totally to myself. I usually run errands or catch up on things around here during this time, and if you know my Emily, you KNOW I need that break to not go crazy LOL. She's just the most energetic, persistent, demanding, curious, loud, smart, and loving kid I know. She melts my heart with one little smile. Sigh.
Anyways, as soon as I saw the kit this months, I knew I had to use these specific papers to scrap this picture. I thought it would be adorable, and look at it, isn't it? I know I'm not the best scrapper in the world or anything, but I LOVE this layout. The colors are some of my favorite, believe it or not, and the picture....ohhh I just love it people! LOL
First time I ever tried making zipper flowers. I think I need more practice, don't you think? Hehe. Like on my last layout I posted, I only need to add the journaling and this will be all done and ready to be put into her album.Yippee!

Tuesday, November 29, 2011

A Two Page Layout

As promised, here I am again with more of my November layouts, but first, I wanted to ask: did you shop 'til you dropped yesterday(Cyber Monday)? I sure did, barely slept, and I'm still on the hunt for stuff....toys to be exact, for Emily's cousins LOL. I am so super glad we are now able to shop online because it sure is a great way to get stuff with barely any issues.  However, there are certain things that I can't shop online for, because I definitely need to touch them, try them on, etc, but for many things, ohhh I SO LOVE online shopping! Hahaha
Ok. Back to the layout. I have not made a double layout in years! Well, this month I decided to make one, and here's what came out of that try :)
I used Pink Paislee mist-able fabric trims to make the three little puffy flowers you see. I hadn't used a transparency/acetate sheet in a while either, but love this one with the clocks on it. I now just need to journal on the journaling spot on the right side of the layout as well as on the small one on the left, and it will be finished. 
There's more to come, including the sneaks to my projects I made for the Paper Niche in the month of December. So excited to show you! See ya tomorrow!

Monday, November 28, 2011

Cyber Monday and Our Family

Hello friends! Are you all shopped out yet? I haven't even bought my first Christmas present, and I'm sick of the stores already! LOL Just getting some clothes for my daughter last week, and searching for the best "crafty" deals online, really tired me up. I have been totally busy at home, and the events just keep coming up. Ohhh the holidays!
Here's another one of my layouts I made for this month's Paper Niche kit. Love the colors on this one. Again, it's made up of a mixture of My Minds Eye, the Prima Printery Collection and American Crafts Amy Tangerine.
I gotta run now. More tomorrow, promise!

Tuesday, November 22, 2011

Lovely Emily

Hi all!
Every year is the same thing, all the stress of shopping for people, attending family gatherings, and all other things that come along the end of the year have already started. Thanksgiving is just around the corner and it is definitely busy around my house.....and it's only bound to get busier as the year comes to a close. I dread the stores now a days, the long lines, finding parking. How about you?
Today I wanted to share with you a layout I created using the Paper Niche's November Kit. It is a gorgeous kit and I had a great time creating with it. Can you tell?

As I look back at this picture, I realize how much Emily has grown in the last year. It's amazing. Never in a million years did I think that she would change so much, so quickly. In a blink of an eye she turned into a big girl.... I'll share the rest of what I've been able to make with the kit in the next few days, and I'll be showing you how much bigger she looks now, though if you follow, you , might already know :) Thanks for stopping by!

Friday, November 18, 2011

Winter Layout with a FUN Background with LSG

Hello everybody!
Today I wanted to share with you this neat hanging layout I created for my mother. Last year, I made her one, and she asked me to make another one for her this year. This one is a little bigger than the one I made before, but it turned out just as cute, if not cuter (to see the one I made last year click HERE).
I started with a plain old piece of 8 1/2 by 8 1/2 chipboard, which I covered in white cardstock. I then proceeded to make the background using some Starbursts Stains from Lindy's Stamp Gang. I made a very detailed tutorial video of exactly what I did with all the pieces on this layout, and you can watch it by clicking HERE. All the colors of stains and embossing powders I used are detailed there.


I love all the shimmer, and it truly does give me the feeling of winter every time I look at it. I hope she likes it!

Wednesday, November 16, 2011

Want to win a gift card?

Hello everyone!
Today I want to give you the opportunity to win a $25 dollar gift card. You want one?
Watch THIS video and see how you can enter to win one!
Thanks for stopping by and good luck!

Monday, November 14, 2011

Super Simple Monday: Holiday Cards

Hello everyone!
I could not wait to continue with the Super Simple projects, so here I have four cards to share with you. They are all very easy to replicate and mass produce, perfect for the holidays!
The paper I used for all cards is HERE, and for this first card I used  THIS Inkadinkado Stamp set. I also used in all the cards some of this ribbon HERE.

For this next card I used a Spellbinder's die set which you can find HERE, a Fiscars border punch, and some great glitter dots you can find HERE.

The texture on this next card I embossed using a new Stampin up embossing folder from the Christmas 2011 Mini Catalog. I also used a Christmas Martha Stewart punch for the foiled border underneath the ribbon.
On the center of some of the embossed snowflakes, I dotted some silver ink using gel pens you can find HERE. A small detail that adds a little bit more interest to the overall design.
For this last card, I used THIS Inkadinckado Stamp set, as well as THIS Quickutz die.
I also used my favorite, button bling, which you can find HERE.
I hope you enjoyed these cards. For more details you can watch the video I made HERE.
I will be hosting a giveway next, so stay tuned on my YouTube channel for the video of the announcement.
As always, thanks so much for stopping by and leaving a comment. I really love reading them!

Sunday, November 13, 2011

Super Simple Series

Ever since I created the simple Christmas layout of my daughter (you can look at the previous post if you missed it), I've been thinking about the forgotten beauty of simple projects. We are so into so many different mediums, and materials (which are SUPER FUN to incorporate into our projects), that we sometimes get a bit caught up in the fact that if we don't "add this or that", the project might not be as pretty as it could be. We forget that, what really makes a project stunning, is the use of color and design, no extras needed. Now, don't get me wrong, very elaborated projects are also stunning, and I love them. They are just a bit more time consuming.
So, after giving it some thought, I've decided to start a little series of posts dedicated to only super simple projects... things that will be super simple to recreate, mass produce etc. (NOT that my projects are super elaborated, or complicated----that's just NOT my style--------, but these will be EXTRA clean and simple). There won't be any specific days to these project posts...they will happen as they happen. You'll know I've got one by the title of the blog post, i.e. Super Simple Sunday, if the post lands on a Sunday, Super Simple Wednesday, if the post lands on a Wednesday etc. 
The cool thing will be, that from time to time I'll host a Super Simple Challenge and give out prices. How cool is that?
Well, now you know what I will be up to, so stay tuned for the future challenges. It will be worth your while to participate.
To start off, I want to share this Super Simple card I made for a friend's birthday. This card was a quick one to create, because the only time consuming thing was the coloring of the hair, and paper piecing of the image, but I had done that previously for a different project, and in the end I'd decided not to use the image. That is a cool tip for super simple projects: have colored images and/or other embellishments done before hand. It saves you a lot of time!
This card could have definitely been taken up a notch by switching, and/or adding some things around, but  it's clean and simple just as is, and that's how I used it.
I used a gold Atyou Spica pen for the hair bow and necklace, and I also added some gold pearls for the earings and neckalace. I put a chipboard frame on the image that I cut using the Baroque die and it's coordinating movers and shapers die from the Tim Holtz Alterations line.
I used some flowers from my stash and three extra gold pearls at the top for the final design element. Super simple, super clean, super fun! I hope you enjoyed!

Tuesday, November 8, 2011

Dimensional? Nah!

Hello there! 
Lately I've realized how I've managed to change the way I make my layouts. Before, I pretty much had one dimensional layouts, and would not even think of making things too dimensional, in fear of having them get smashed on my albums. All in all, I make things with the thought of having them last for a long time... the thought of having them get ruined in a short period of time scares lol.
However, it seems that I've grown out of that train of thought, because if you have noticed, my recent layouts are completely dimensional...the more dimension, the better! Who would have thought, huh?
I guess it all comes down to the new love of bulky mulbery paper flowers, foam tape, fabric embellishments, and so many other three-dimensional materials that continue to be introduced into scrapbooking today. As a result, we've all had to adapt to new ways of storing our layouts, (and I say we, because I know I'm not the only one on this boat lol).
At this time I'm really into dimensional layouts, but from time to time, I do go back to thinking simply, and for this layout that's exactly what I did. This layout is the epitome of simplicity, and as basic, and very one-dimensional as it is, I love it. It definitely shows that not everything needs to pop out of the page to be pretty, and that sometimes the picture and journaling do ALL the talking.
I used a bunch of the goodies I received from Scrapbuck.com to make this layout. Love the button bling I used. See how pretty those bling pieces are? To get some of your own you can click HERE.

I just love this child!
You can find more of the products I used HERE, HERE, and HERE. Thanks so much for stoping by, and going back to basics with me :) More coming soon!

Monday, November 7, 2011

SOOOO excited!!!!!!

Good afternoon everyone!
I'm so super excited because I've just had a winning streak in the last two days! I can barely believe it! It's been a long while since I've won anything, and I finally won not one, but three things!!!
First, I just found out I won a random giveaway on YT from a fellow scrapbooker staphanoid69. Then, yesterday I won the Iamroses blog hop, so some delicious mulberry paper flowers are coming my way really soon, yay! Love, love love!
Then today, just now when I put the baby down for her nap, I decided to check Tim's blog (Holtz), not realizing I'd totally missed his Etsy sale (he sold out of everything in 10 minutes! Seriously!), but I found out I was one of the 5 winners he chose for a spot on Jennifer Mcguirre's and Kristina Werner's Holiday Boot Camp Class!!!! Talk about awesome!!!

I've followed them for a long time, and like their simple approach to cards. This will be fun for so many reasons! I just had to share my happiness today. It's the little things in life sometimes that just make my day!
Thanks so much for stopping by. More projects coming soon!

Thursday, November 3, 2011

Two more October Layouts

Hi y'all! 
Im back with the last two layouts I had not shared with you from the October Paper Niche Design Kit. Boy did it take me long to get these here! October was busy, and I don't think these next two months are going to get any better. If anything, I think they'll be worse with all the other holiday related stuff that's being added to my list of to do's!
Oh well, that's life, right? It gets busy!
Well, there are still a few October kits left ( if you are interested just head on over to the Paper Niche's Website or blog and get one fast!). It was really a nice one. 

Thanks so much for stopping by today. I appreciate and enjoy reading all your comments!

Tuesday, November 1, 2011

Christmas Mini 2011

Hello everyone!
The holidays are quickly approaching. Can you believe it? It seems like this year flew by! Sooner than we know it, it will be all gone, and 2012 will be here! Wow. It seems hard to believe, but it's the truth!

Today I'm sharing with you a Christmas mini album I just completed, using some of the fabulous product I received from Scrapbuck.com. I am really happy how it came out, and I'm totally in love with it's shape!
It the is perfect little book to hold Emily's first Christmas pictures. It's amazing, but she doesn't look like this at all anymore. She looks like a big kid now, almost two years old. To think that last year she was just a little baby! Time sure does fly when you're having fun!
I cut out the book out of light weight chipboard using the Quickutz nesting die I received, which you can find HERE. The paper collection I used is THIS ONE.
I really enjoyed using many of the 3D embellishments in my haul, and I think they gave just the right touch of whimsy to the mini. Some of the embellishments I used are HERE, HERE, HERE and HERE.


The embossing folder I used is this one HERE.


I really LOVE the finished look. The white acrylic paint on the edges of the album really makes it feel like winter season was there (even though it really wasn't haha---that's South Florida for you!).
For more info on all the products I used please watch the videos HERE and HERE, and don't forget to visit Scrapbuck.com to get products at awesome prices. I hope you enjoyed!
Related Posts Plugin for WordPress, Blogger...